

How To Change Right Side Headlight On 2011 Ford Fusion
Ford Fusion Headlight Bulbs Replacement Guide
How to supplant the low axle, high axle and turn signal bulbs in the headlight of a 2006-2012 Ford Fusion sedan.
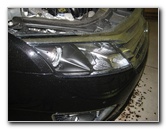
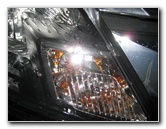
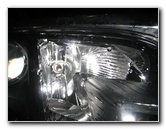
Ford Fusion Headlight
Turn Indicate Seedling - Corner
Plow Signal Socket
Owners of other Ford, Lincoln or Mercury vehicles such as the Fiesta, Mustang, Focus, Taurus, Flex, Border, Expedition, Escape, Ranger, F-150, MKZ, MKS, MKX, MKT, Navigator, Milan, Grand Marquis, Mariner, and Mountaineer may likewise observe this DIY didactics guide to be helpful.
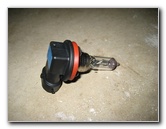
Replacement headlight bulbs for the '06-'12 Fusion with their respective part numbers are equally follows: Low Beam # H11, Loftier Beam # H7, and Plough Betoken # 3457A.Tools required: Plough Point - none, Depression Beam - flathead screwdriver or panel tool, High Axle - socket fix and wrench.
1/4 Turn Counter Clockwise
Pull Out Plow Signal Seedling
Loftier Beam Bulb - Center
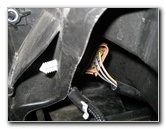
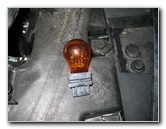
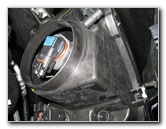
To supplant it, reach behind the headlight and locate the tan / light orange turn indicate light bulb socket.
Rotate it 1/4 turn counter clockwise and pull the bulb out of the headlight assembly.
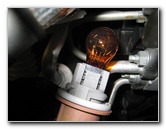
Pull the one-time # 3457A bister colored plow signal bulb directly out of the socket.
Button in a new # 3457A seedling into the socket, re-install the seedling into the headlight associates and rotate the socket 1/4 turn clockwise to lock it in identify.
Rubber Dust Cap
Loftier Beam Embrace Removed
Wheel Well Liner
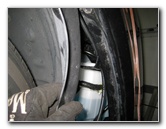
To access the driver side high axle bulb requires removing the air box.
To access the passenger side headlight seedling, remove the washer fluid fill hose past removing the single 7mm bolt.
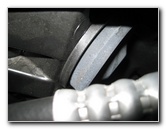
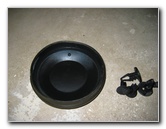
Pull off the black rubber dust cap from the rear of the headlight assembly. Rotate the base of operations of the loftier beam bulb 1/four plough counter clockwise and pull it out from the headlight.
Use a flathead screwdriver to disconnect the ability connector from the base of the bulb.
Remove Liner Fasteners
Using Console Removal Tool
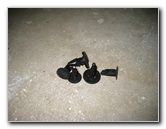
Black Plastic Fasteners
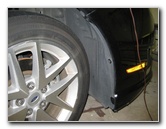
Plow the wheels all the way in the opposite direction of the burnt out low axle.
For example, if you lot need to supervene upon the passenger low beam bulb, turn the steering bicycle all the way to the left.
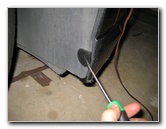
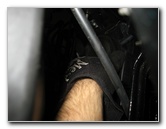
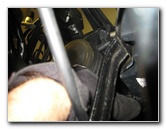
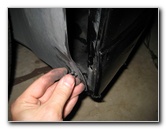
At present that yous accept more room to work with the wheel turned out of the style, you can remove the blackness plastic wheel well liner fasteners.
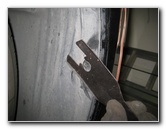
The fasteners can be removed with a flathead screwdriver by prying out the small center portion and then popping the larger outer role of the fastener with your fingers or a panel tool.
Pull Back Cycle Well Liner
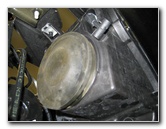
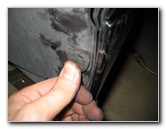
Reach In To Depression Axle
Low Beam Cover Removed
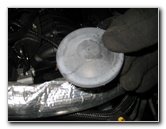
Pull off the grit cover and set up it bated in a safe place.
1/4 Turn Counter Clockwise
Low Beam Bulb Removed
Install New H11 Seedling
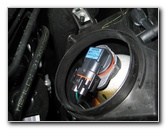
Carve up the power connector from the base of the low beam bulb past gently prying off the retaining clips.
Push button a new # H11 depression beam bulb on to the power connector, insert the bulb into the rear of the headlight assembly, and rotate it i/iv turn clockwise to lock it in place.
1/4 Turn Clockwise
Replace Safe Dust Cap
Replace Wheel Well Liner
Re-Insert Fasteners

Test New Headlight Bulb(southward)
For more than, please check out my Ford Fusion Repair & Maintenance Guides page.
Source: https://www.paulstravelpictures.com/Ford-Fusion-Headlight-Bulbs-Replacement-Guide/
Posted by: parkfrommory.blogspot.com
0 Response to "How To Change Right Side Headlight On 2011 Ford Fusion"
Post a Comment